Bu içeriği görüntülemek için JoVE aboneliği gereklidir. Oturum açın veya ücretsiz deneme sürümünü başlatın.
Assays for Qualitative and Quantitative Assessment of Mouse Urine Glucose Concentrations
Bu Makalede
Overview
This video demonstrates a procedure for collecting mouse urine and assessing its glucose levels. To evaluate the glucose level, immerse a test strip coated with enzymes and a chromogenic dye into the sample, initiating a color change that indicates the glucose levels. For quantifying urine glucose levels, introduce a urine sample to a multiwell plate with escalating glucose concentrations, add the reaction mixture, and incubate. Measure the absorbance to create a standard curve and compute the glucose levels based on the sample absorbance.
Protokol
All procedures involving animal models have been reviewed by the local institutional animal care committee and the JoVE veterinary review board.
1. Spot urine glucose test
- Place a piece of clean Parafilm on a flat surface.
- Gently pick up a mouse by the tail and set it on the Parafilm.
- Restrain the mouse by the scruff using the thumb and index finger. Gently pick up the mouse while restrained at the scruff, causing the mouse to urinate as a stress response. Allow for a drop of urine to fall onto the parafilm surface. Return the mouse to its cage after collecting the urine drop.
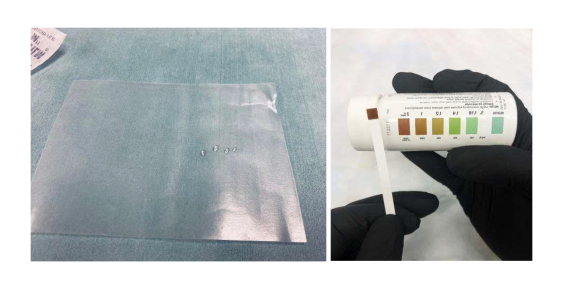
- Dip the reagent end of a Diastix strip in the fresh urine drop collected on the Parafilm surface. Remove the strip immediately and lay it flat on a surface with the color side up. Wait at least 30 seconds for a color to develop on the strip fully. Compare the developed color with the reference chart provided on the Diastix container (Figure 1).
Tips: If the mouse does not urinate on the Parafilm, apply gentle pressure on the lower abdomen of the mouse (around the urinary bladder) using the index finger. This approach will help release urine drops onto the parafilm. For mice that don't urinate after following the procedure described above, wait 20 min and start the procedure again. Ensure all procedures are carried out while adhering to the IACUC guidelines.
2. Collection of 24 h urine using a mouse metabolic cage
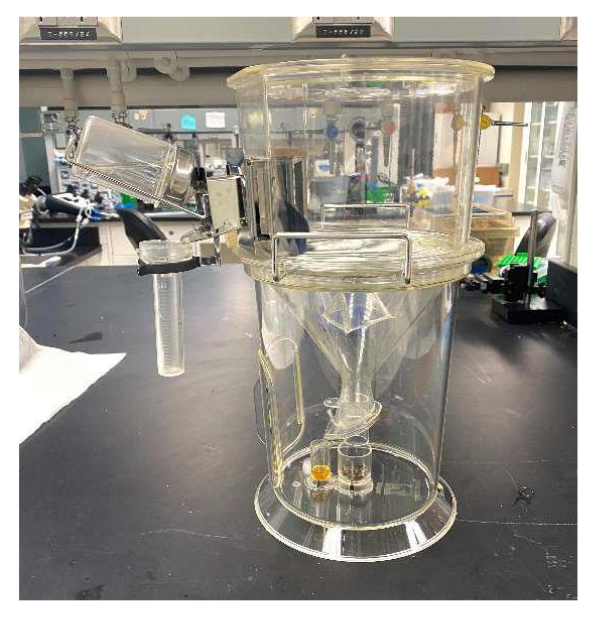
- Assemble a Tecniplast metabolic cage (Figure 2) according to the manufacturer's instructions.
- Fill up the feed-assembly with powdered chow and then attach the feed assembly to the appropriate metal tab on the upper chamber.
- Fix the water bottle support onto the remaining metal tab on the upper chamber.
- Fill the empty water bottle and then slide it into the bottle support, ensuring that the sipper tube is in the hole.
- Put a mouse in the metabolic cage and then cover it with a lid.
- Ensure that the cage lid is fitted properly.
- Position a urine collection tube and a feces collection tube in their appropriate spots on the lower chamber floor.
- After 24 h, retrieve the urine collection tube and perform a glucose assay to determine urine glucose concentration. If the glucose assay is not performed on the same day, freeze the urine sample in the -80°C freezer.
3. Determination of 24 h urine Glucose concentration
- If the urine sample is stored at -80°C, let the sample thaw before performing a glucose assay.
- From 100mg/dl stock, prepare eight standards ranging from 25mg/dl to 0mg/dl according to the assay kit directions.
- Prepare standard wells and urine sample wells in a 96-well plate, all in duplicates, according to the kit manual.
- After initiating the reaction by adding the recommended amount of enzyme mixture to all wells, cover the plate and let it incubate for 10 min at 37°C.
- Read absorbance at 500-520 nm using a plate reader.
- Analyze the data according to the assay kit instructions. Plot the absorbance of each standard vs the glucose concentration and use the graph to determine the glucose concentration of the 24-hour urine sample.
Sonuçlar

Figure 1. Spot urine glucose test. The mouse urine drops collected on Parafilm and the color reference chart provided on the Diastix container.

Figure 2. Tecniplast metabolic cage for 24 h mouse urine collection. A mouse is sin...
Açıklamalar
This article has been published
Video Coming Soon
JoVE Hakkında
Telif Hakkı © 2020 MyJove Corporation. Tüm hakları saklıdır