Compound Administration III
Source: Kay Stewart, RVT, RLATG, CMAR; Valerie A. Schroeder, RVT, RLATG. University of Notre Dame, IN
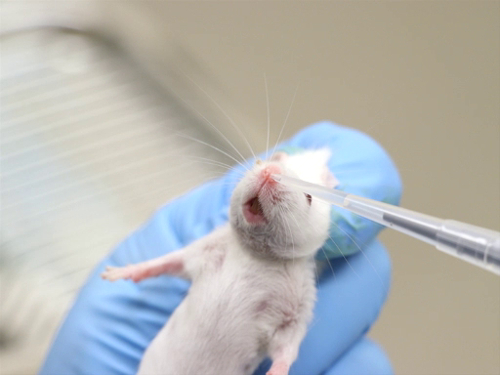
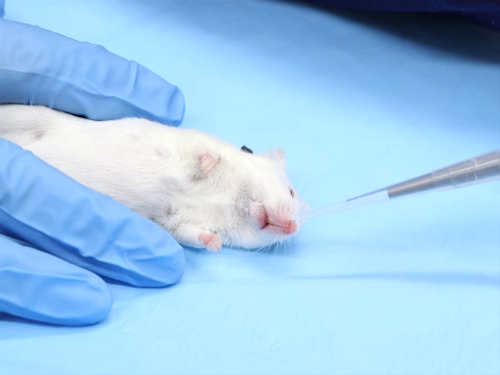
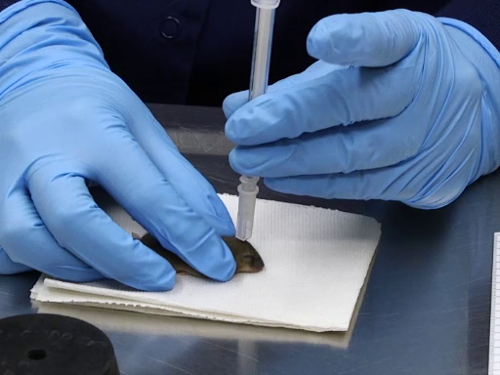
There are many commonly used routes for compound administration in laboratory mice and rats. However, certain protocols may require the use of less commonly used routes, including intradermal, intranasal, and intracranial injections. Specialized training is essential for these procedures to be performed successfully. Justification for these routes may need to be provided to gain Institutional Animal Care and Use Committee (IACUC) approval.
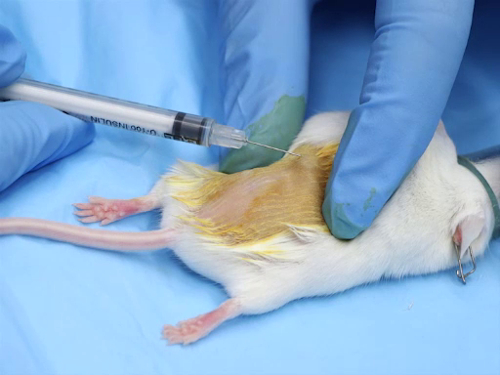
1. Intradermal administration
- Most intradermal injections are aqueous-based compounds. The solutions must be physiologically buffered to have a neutral pH, in order to avoid tissue necrosis at the injection site.
- The needle size range is 25-30 gauge, the smallest possible.
- The dose range per injection site is 50-100 µL. Injecting excessive volumes can result in necrosis at the injection site or leakage of the compound out of the site due to pressure.
- For accurate placement o
The administration of compounds into animals can have a significant effect on both the wellbeing of the animal and the outcome of the experimental data and scientific value. The proper method of delivery is essential to the success of the experiment. Many factors must be considered to determine the best route, including the scientific aim of the study, the pH of the substance, the required dosage volume, the viscosity of the substance, and the wellbeing of the animals. Technical expertise is also a requirement for all in
- Turner, P.V., Pekow, C., Vasbinder, M. A., and Brabb, T. 2011. Administration of substances to laboratory animals: equipment and considerations, vehicle selection, and solution preparation. JAALAS. 50: 614-627.
- Dhuria, S.V., Hanson, L.R., and Frey II, W.H. 2010. Intranasal delivery to the central nervous system: mechanisms and experimental considerations. Journal of Pharmaceutical Sciences. 99: 1654-1673.
- Stevens, J., Suidgeest, E, Van der Graaf, P.H., Danhof, M., and De Lange, E.C. 2008. Development and evaluation of a new, minimal-stress animal model for intranasal administration in freely moving rats. Poster presentation at American Association of Pharmaceutical Scientists Annual Meeting, Atlanta, Georgia.
- Morton, D.A., Jennings, M., Buckwell, A., Ewbank, R., Godfrey, C., Holgate, B., Inglis, I., James, R., Page, C., Sharman, I., Verschoyle, R., Westall, L., and Wilson, A.B. 2001. Refining procedures for the administration of substances Report of the BVAAWF/FRAME/RSPCA/UFAW Joint Working Group on Refinement. Members of the Joint Working Group on Refinement. Laboratory Animals. 35: 1-41.
Skip to...
Videos from this collection:

Now Playing
Compound Administration III
Lab Animal Research
30.9K Views

Rodent Handling and Restraint Techniques
Lab Animal Research
171.8K Views

Basic Care Procedures
Lab Animal Research
27.5K Views

Fundamentals of Breeding and Weaning
Lab Animal Research
35.2K Views

Rodent Identification I
Lab Animal Research
54.1K Views

Rodent Identification II
Lab Animal Research
25.3K Views

Compound Administration I
Lab Animal Research
99.4K Views

Compound Administration II
Lab Animal Research
34.4K Views

Compound Administration IV
Lab Animal Research
50.8K Views

Blood Withdrawal I
Lab Animal Research
169.5K Views

Blood Withdrawal II
Lab Animal Research
72.0K Views

Anesthesia Induction and Maintenance
Lab Animal Research
49.8K Views

Considerations for Rodent Surgery
Lab Animal Research
22.2K Views

Diagnostic Necropsy and Tissue Harvest
Lab Animal Research
57.4K Views

Sterile Tissue Harvest
Lab Animal Research
34.5K Views
Copyright © 2025 MyJoVE Corporation. All rights reserved