1. Sample Collection
- Collect soil sample and transport to the laboratory for microbial analysis.
- In the lab, weigh a 10 g sample using an analytical balance.
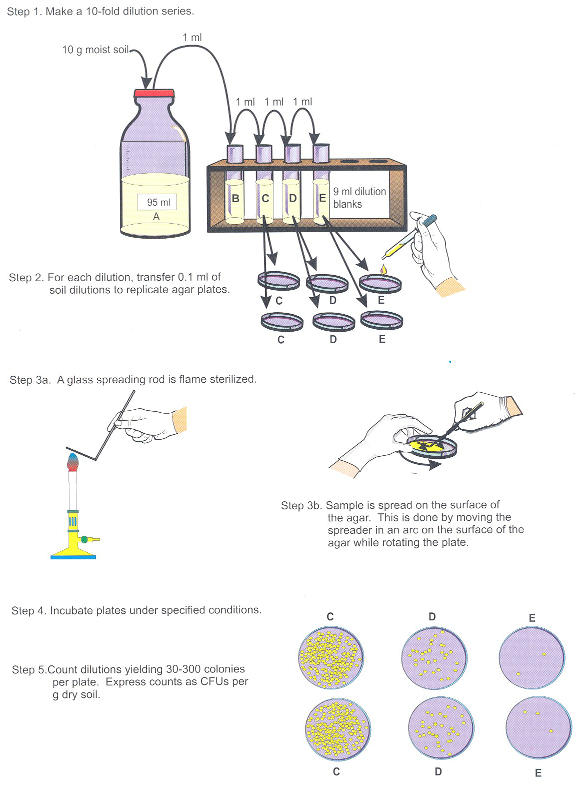
- Dilute the sample 1:10 into 95 mL of phosphate-buffered saline (10 parts soil is equivalent to 5 parts aqueous liquid), and vortex to mix (Figure 2, Step 1).
- Perform subsequent 1:10 dilutions up to at least 10-5 g soil per mL, and spread-plate selected dilutions in replicates of two or three onto a low nutrient agar medium (e.g., R2A) (Figure 2, Steps 2-3).
- Incubate the plates for one week at room temperature (Figure 2, Step 4).
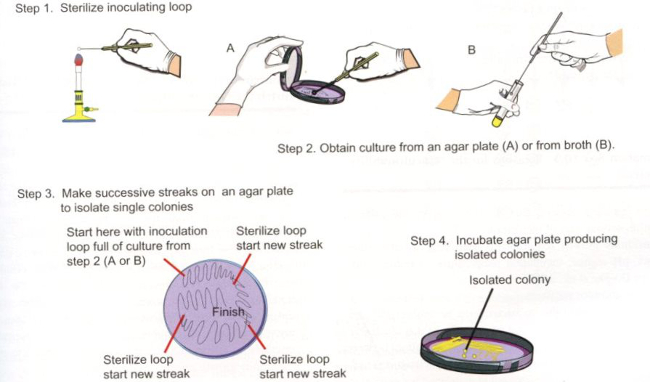
- Select one or two colonies for isolation, and streak onto fresh agar plates (Figure 3, Steps 1-3).
- Incubate the streak plates for two to three days at room temperature (Figure 3, Step 4).
2. Preparation of Bacterial Smears
- Observe the streak plates for isolated colonies.
- To prepare each smear prep, dip an inoculating loop into ethanol, flame-sterilize, and place 1 to 2 loopfuls of sterile distilled water onto the center of pre-cleaned glass slides.
- Sterilize the inoculating loop again as previously described. Once cooled, remove a small amount of culture from a single isolated colony and mix it with the water droplets on the slide (the smear should resemble diluted skim milk). The inoculating loop must be cooled prior to colony isolation. A loop that is too hot will cause the colony and/or medium to splatter, which may lead to aerosolization of bacteria. Generally, when the loop is too hot for use, a “hissing” sound will be heard when applied to the agar or colony. Improper cooling of the loop may also result in less efficient culture-to-slide transfer, and distortion of cell morphology.
- Spread the smear over the surface of the slide measuring approximately 2.5 cm x 2.5 cm, and allow it to air dry. It is important for air drying to occur under laminar flow conditions. Slides should not be blown dry so as not to disrupt the smear. Also, slides must not be flame-dried, in order to maintain cell morphology.
- After drying, heat fix the smear by passing the slide quickly through a flame 2-3x. The slide should not be held stationary in the flame, to prevent distortion of cell morphology and/or damage to the glass slide.
3. Gram Staining
- Secure the slide at one end using a clean clothespin.
- Cover the smear with crystal violet (primary stain) and hold for 2 to 3 min.
- Carefully wash the slide with distilled water. The water stream should not be directed at the smear in order to prevent damage and/or detachment from the glass slide.
- Cover the smear with Gram’s iodine and hold for 2 min, then gently rinse the slide with water.
- Decolorize the smear using 95% ethanol until stain no longer washes from the slide (this usually takes no more than 20 s depending on the thickness of the smear), then immediately rinse with distilled water. This step is critical to avoid over decolorizing the slide, which may lead to a false Gram stain designation (i.e., Gram-variable).
- Add the counterstain (safranin) to the smear and hold for 30 s. Then gently rinse the slide with distilled water and blot dry using absorbent paper.
4. Microscopic Observation of Slides
- Observe the slides using low (e.g., 4X or 10X), high-dry (e.g., 40X), and oil immersion (100X) objectives. For oil immersion, add the oil directly to the smear.
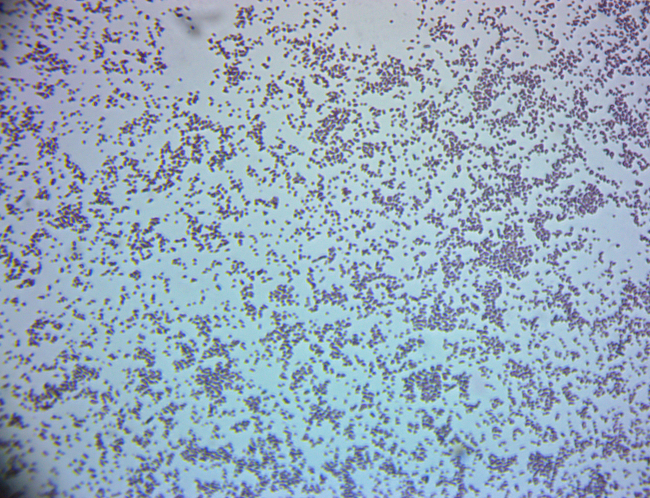
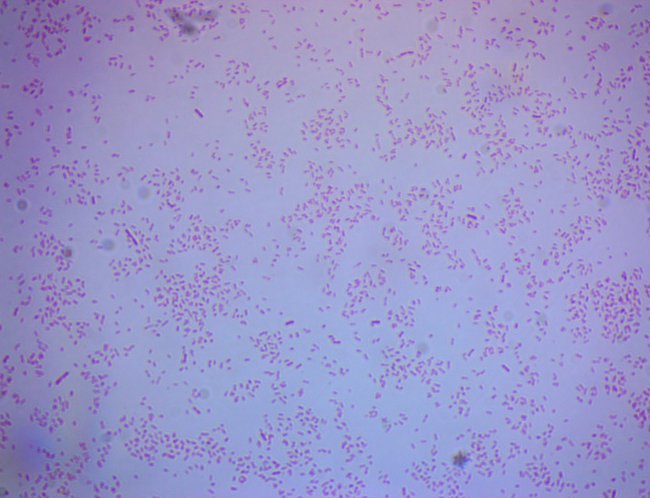
- For representative results of Gram-positive and Gram-negative soil bacteria, see Figures 4 and 5.

Figure 2. Dilution and Spread-Plating Technique. Please click here to view a larger version of this figure.

Figure 3. Colony Isolation Using the Streak Plate Technique.

Figure 4. Gram-positive soil bacterium Staphylococcus aureus.

Figure 5. Gram-negative soil bacterium Escherichia coli.