18.1K Views
•
11:42 min
•
June 19th, 2016
DOI :
June 19th, 2016
•0:05
Title
0:52
Fabricating Microelectrode
2:39
Drosophila Preparation
5:34
Recording from R1-R6 Photoreceptors or LMCs
8:50
Results: Applications
10:27
Conclusion
Transcript
The overall goal of this procedure is to record intracellular electrical responses of Drosophila photoreceptors and visual interneurons to controlled light stimuli. This method can help answer key questions in the neuro-coding field, such as how a light stimuli will encode it into one of its responses, or how its visual information and photoreceptors and interneurons extract from light stimuli. The main advantage of this technique is that it provides long-lasting, high-quality recordings from the study with little damage to a intracellular milieu and information sampling.
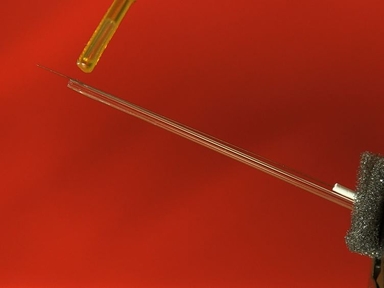
Feature of demonstration that this may affect is critical as its various steps are difficult to learn to perform correctly without seeing them. Pull a reference microelectrode from filamented borosilicate, or from quartz glass tubing using a standard pipette puller. Try to achieve a short, gradual taper.
The exact settings vary between instruments. The pore size at the tip is not crucial because it will be broken for the experiments. Then pull a recording electrode from the same glass tubing and try to achieve a 10 to 15 millimeter long fine gradual taper.
At a light microscope, mount the electrode on a glass side with multiple adhesive and use a 40x air objective to inspect its tip. A good electrode tapers smoothly to an invisibly small tip, around which continuous parallel darker and lighter interference patterns can be seen. Just before the experiment, backfill the reference electrode with fly ringers, using a five milliliter syringe connected to a particle filter, with a fine plastic tip.
For photoreceptor experiments, load the recording electrode with 3 molar potassium chloride until a droplet forms at its large end. This will minimize noise from the liquid junction during recording. To work with histaminergic LMCs, fill the recording electrodes with 3 molar potassium acetate, 0.5 millimolar potassium chloride to minimize the effect on the cell's chloride battery.
Begin with loading a fresh fly vial with five to 10 day old flies. Younger flies are more fragile, but can be recorded from. Select the first fly for electrophysiology.
Big females are easiest to work with. When in the catching tube, take advantage of their inherent tendency to climb upwards into the pipette tip and cap up the smaller tip. Next, connect a 100 milliliter syringe with a flexible plastic hose to the pipette tip, which is enlarged just to let a Drosophila through and connect the other end to a large pipette tip attached to the fly-holder.
Then squeeze a small volume of air from the syringe to eject the fly into the fly-holder. Look through the stereo-microscope and gently administer more air until the fly's head is protruding from the conical end of the fly-holder. Make sure that the fly is firmly trapped by its thorax.
Then secure the fly with beeswax. Use the lowest temperature of the wax heater to cleanly melt the wax, which will appear transparent. If it is too hot, the wax will burn away.
Immobilize the fly's head by applying a little beeswax to the proboscis and the corner of the right eye, avoiding the cornea. Fix these two points to the fly-holder. Finish this step quickly to avoid burning the fly.
Next, put on goggles and fabricate a microknife. Clamp a non-stainless steel razor blade with two flat grip blade holders and crack a small strip of its sharp edge. Ideally, produce a razor sharp edge that resembles a spire.
Now, carefully and with great attention to detail, use the microknife to open a few ommatidia of the fly's left eye, such as at four to five ommatidia from the dorsal cuticle just above the eye's equator. This will provide the passage for the recording microelectrode. This is quite challenging, requires a well made knife, and must be learned with practice.
Then gently remove the small piece of cornea from the opening, exposing the retina underneath. Now using the fine hair of the petroleum jelly applicator, swiftly cover the hole with a tiny blob of petroleum jelly. The jelly has the added benefit of reducing the pipette's intramural capacitance.
Avoid smearing the eye as this blurs the optics. When operating the microelectrode amplifier, always be grounded by touching the metal surface of the Faraday cage or anti-vibration table to prevent static charges. Secure the mounted fly to the fly preparation platform pole.
Rotate the fly-holder so that the fly's left eye is directly facing the investigator. Next use a small course micro manipulator to insert the blunt reference electrode gently through the fly's ocelli into the head capsule. Make certain the fly still appears healthy and moves it antennae.
The preparation must be superb to merit recording from. Now drive the sharp recording microelectrode into the left eye through the jelly-coated opening. As it enters the tissue, the electrode tip location should be apparent by its reflectance pattern.
The fragile electrode tip must be guided perfectly or it will break, which is very challenging. Depending on the cell type being recorded from, the fly's head should be oriented slightly differently. With the electrodes in place, turn on the microelectrode amplifier.
Then turn off the cold light source, unplug it from the mains, and connect it to the central ground to minimize ground loop-induced electrical noise. Next, adjust the gooseneck light guides so that the Carden arm system can be freely moved around the fly. Then switch off the room lights to put the fly preparation in relative darkness.
Now measure the resistance of the recording electrode in the eye. It must be between 100 and 260 megaohms. Sometimes the tip is blocked and can be cleared using the amplifier's capacitive buzz and current pulse functions.
If that doesn't help, use a new electrode. Next, set the amplifier to current clamp or bridge and zero the voltage between the electrodes. After the fly has been dark adapted for a few minutes, drive the recording electrode tip into the eye in 0.1 to one micron steps using a piezo stepper or using gentle rotation of the fine resolution knob.
At each step, stimulate the eye with a one to 10 millisecond light flash. Each light flash will cause a brief dip in the voltage or the ERG. When the electrode tip enters the lamina, closing on the LMCs, the ERG reverses.
Then proceed with taking measurements. Due to the non-invasiveness, signal performance of individual cells can be studied in their near natural state. Voltage response by an R1-R6 photoreceptor to dim and bright light was measured at 20 degrees Celsius.
Next, an R1-R6 photoreceptor was compared with an LMC at 25 degrees Celsius. Each was measured on a different fly as intracellular recordings by two sharp microelectrodes in the same fly are too difficult to be viable. The repeatability of the responses becomes obvious when the data is superimposed.
Signal-to-noise ratios in the frequency domain were obtained by four year transforming the signal and noise data chunks into power spectrum, and then dividing the mean signal power spectrum by the corresponding mean noise power spectrum. The result can be exceedingly sensitive to signals in the best preparations. The technique can be used to record for many species.
Coenocia flies were given the same naturalistic, repetitive light stimulation at 19 degrees Celsius. The data was taken pre and post-synaptically from the same fly by advancing the recording electrode. The faster dynamics of the recording are consistent with this species'predatory nature.
Once mastered, this technique enables up to always long, high-quality recordings if it is performed properly. While attempting this procedure it's important to realize, I mean it's like learning to play piano. The more you practice, the better results you will obtain.
Following this procedure, other methods, such as pharmacological interventions can be performed to answer additional questions like the role of neuromodulators in shaping the responses. After its development, this technique paved the way for researchers in the field of neurobiophysics to explore how to optimize light information, capture, and transfer, plus the caustic biochemical reactions in the photo transduction machinery and in the following biological sciences. After watching this video, you should have a good understanding of how to prepare the Drosophila for intracellular experiments and how to wake up neuro responses from its photoreceptors and interneurons.
Sharp microelectrodes enable accurate electrophysiological characterization of photoreceptor and visual interneuron output in living Drosophila. Here we show how to use this method to record high-quality voltage responses of individual cells to controlled light stimulation. This method is ideal for studying neural information processing in insect compound eyes.
Explore More Videos
ABOUT JoVE
Copyright © 2024 MyJoVE Corporation. All rights reserved